To get started, follow the steps below to connect your Enquirybot to your Beami account.
Step 1: Bot Approval
After configuring your EnquiryBot and ensuring it meets your requirements, our team will send you a connection link to the email address associated with your Beami account. This link is crucial for authenticating and establishing a secure connection.
Step 2: Check Your Email
Log in to the email account you used to sign up for Beami. Locate the email from our team containing the connection link. If you can't find it in your inbox, please check your spam or junk folder.
Step 3: Log in to Beami
Make sure you are logged in to your Beami account using the same credentials you used during the setup process.
Step 4: Click the Connection Link
Open the email and click on the connection link provided by our team. This will redirect you to Beami for authentication.
Step 5: Confirm Connection
Once redirected, confirm the connection to your Beami account. This step ensures that EnquiryBot gains the necessary permissions to interact with your Beami data securely.
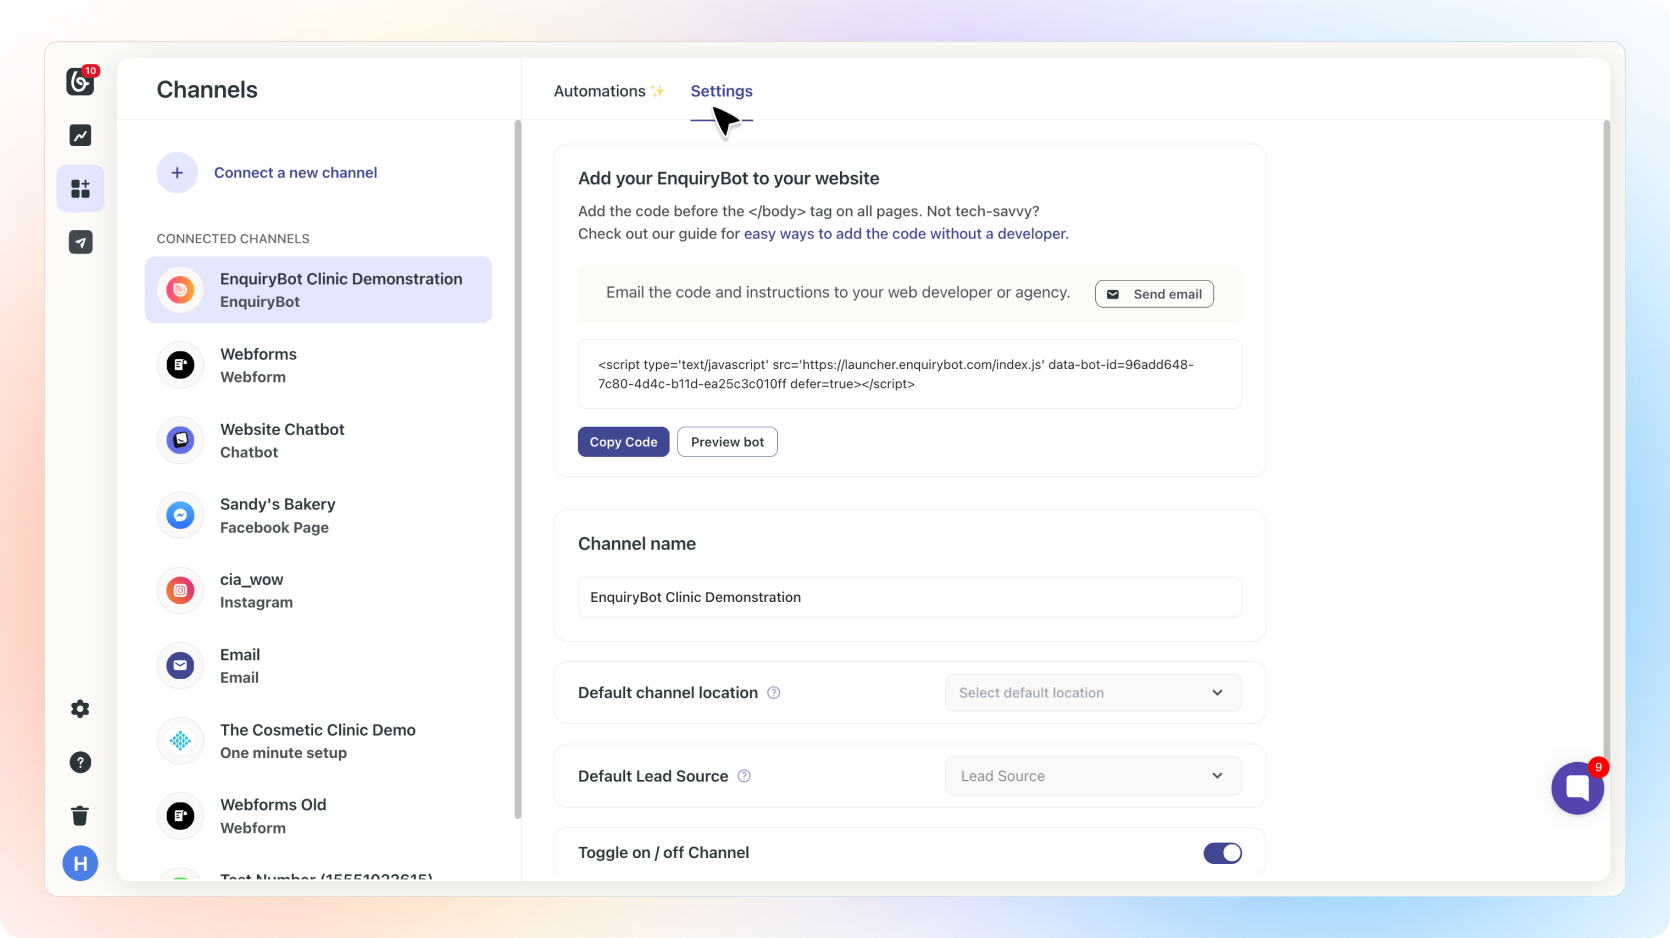
Step 6: Connection Screen
Upon successful connection, you will land on the Beami Connection Screen. Here, you can toggle your EnquiryBot on or off based on your preferences.
Step 7: Bot Script for Developers
On the Connection Screen, you'll find the EnquiryBot script that you can easily share with your developer. Simply click the "Send Email" button, and add the email of your Web developer, making it convenient for your developer to integrate the bot into your systems.
Troubleshooting Tips:
If you encounter any issues, double-check that you are using the correct Beami login credentials.Ensure that you are clicking on the most recent link sent by our team. Older links may have expired.
If the problem persists, reach out to our support team for assistance.